
Why You Should Reduce Using Your Mouse And Rely More On Your Keyboard. Until You Completely Remove Your Mouse Use Case. It's All About Increasing Productivity
I know what you might think. You've spent some cash on your fancy Razor or Logitech mouse. And I know you can't play video games without a mouse. That's completely impossible. If it was possible we would've gamed on our laptop trackpads :)
But here gaming is not the case. I'm talking about when you've reached at an absurd level of being nerd that normal stuff won't satisfy you and want to proof your geekity over and over to yourself.
Of course I'm joking. Think about it like this, each time you want to change something on your code that is 50 lines above. You get off your hands from your keyboard, you put it on your mouse and start scrolling up, choosing your line and then editing it. And after that, again you scroll down and then continue writing your code. Just imagine you done all of that using only your keyboard. You are looking at like 20 or maybe 30 percent of efficiency here?
First Step
Everyone started their no mouse journey by learning vim. Most of people that haven't worked with it, fears it. Even some of you maybe don't even know how to quit it. But I promise you, it's a one time thing. Once you learn it, you are settled. I gurantee that you will love it and wonder why you didn't learn it earlier.
What Is Vim?
Vim (vi improved) is a cli based text editor that focuses on keyboard only utilization. that basically means you navigate, copy, paste, replace, indent, etc. using only your keyboard. vim comes pre-installed in almost all of the operating systems. If you don't have it, you can install vim from your package manager. e.g:
sudo apt-get install vim # debian-based
sudo pacman -Sy vim # arch
sudo dnf install vim # fedora
...
If you are using windows. please refer to this link. just open up your terminal and type vim to start it. you will encounter this on a raw vim startup:
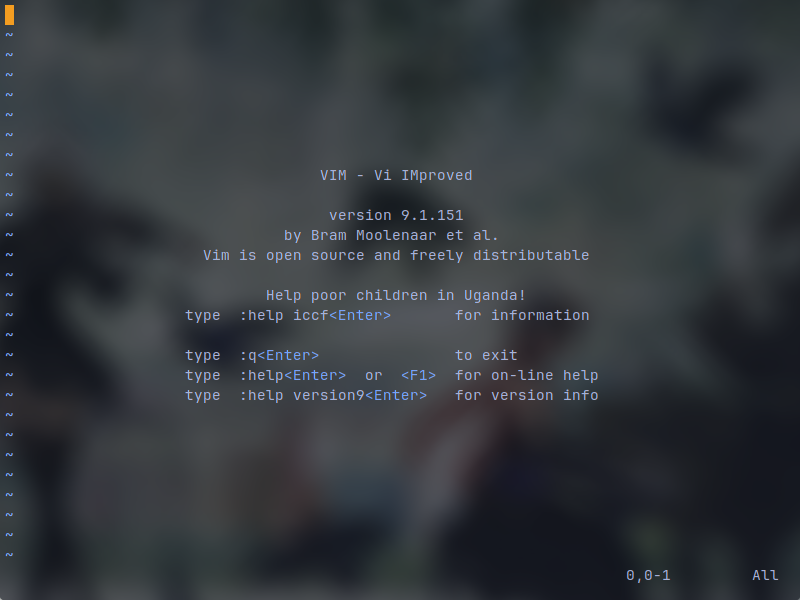 Now you get the idea of this is a text editor. But your real question use how to use it? vim relies on keybindings. vim has 3 modes. Normal, Insert and Visual modes. on our first site each time that we open vim, we are in normal mode. some people also refer to it as command mode as well. in this mode, we can navigate through our code, save and manage it. if you've smashed your keyboard and went on some other modes and don't know how to get back to normal mode, simply press esc key to get back to normal mode. now I want you to quit vim. you have to write a command for it. commands start with : type :q for quitting vim and then hit enter:

If you have modified something in your vim, the :q wouldn't work and for force quitting without saving any changes, you have to type :q! .
Now I want you to open up vim again but here do it for an script of your desired programming language. here I will use Python to show vim's syntax highlighting:
vim example.py
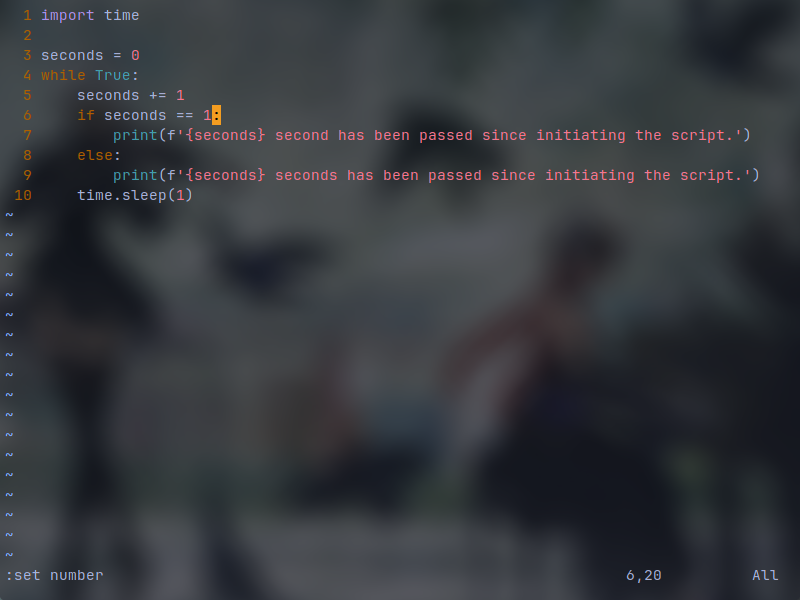
Now it's time to do some writing! to enter insert mode, you can press i and start typing stuff. here, I've wrote a simple python script:
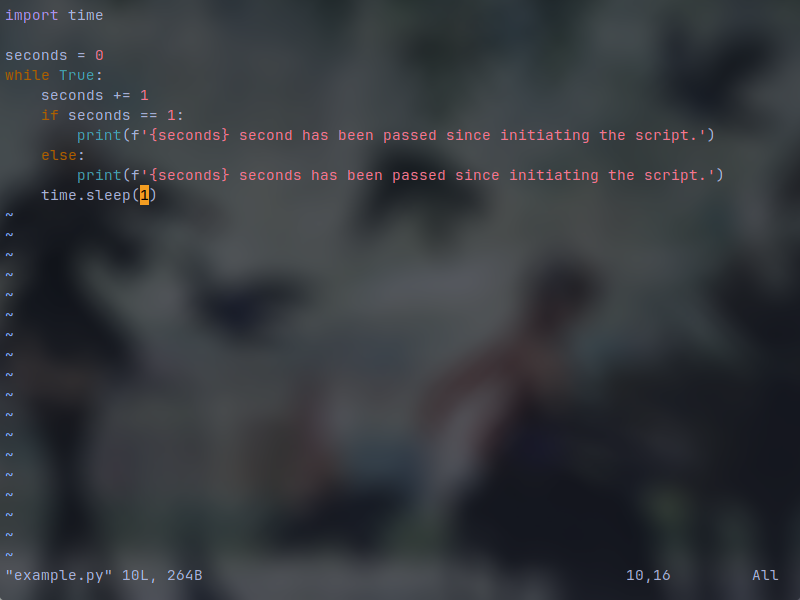
In here you can see it has python syntax highlighting and auto spacing is set to 4 spaces when we press tab.
You can save this file by going back into the normal mode using esc and then typing :w . If you want to both save and exit, type :wq .
Necessary normal mode key bindings:
i         # insert mode on current character.
a         # insert mode on the next character.
I         # insert at beginning of the line.
A         # insert at end of the line.
o         # insert in next generated line.
O         # insert in previous generated line.
esc       # get back to normal mode.

h, j ,k ,l (or arrow keys)  # navigation keys
gg        # jump to beginning of the file.
G         # jump to end of the file.
w         # jump to next word.
b         # jump to previous word.
u         # undo
ctrl + r  # redo
d         # start deleting something.
dd        # delete the whole line.
c         # start editing something.
cc        # start editing the whole line.

# you can combine all of the keybindings. some examples:
5k        # jump 5 lines up.
69j       # jump 69 lines down.
10l       # jump 10 lines right.
3h        # jump 3 lines left.

diw       # delete the next word. (i here means in. delete in word)
ciw       # edit the next word.
ci"       # edit inside quotation marks.
ci(       # edit inside paranthesis.
# ...
Selecting, copying and pasting are explained in visual mode section.
It is possible to run your scripts directly from vim. in normal mode, type :! and follow it by any command you want.

By hitting enter, the command will get executed:
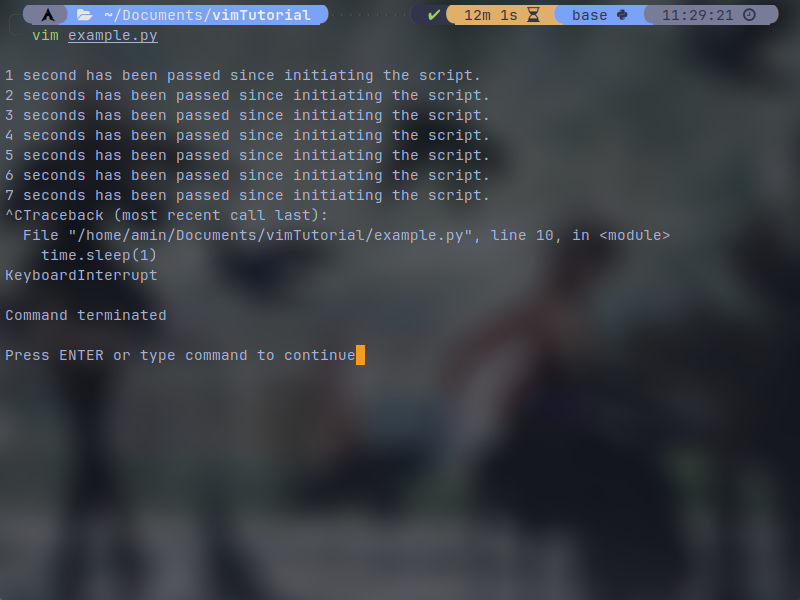 By pressing enter after terminating your script, it will go back to the editor.
Visual Mode
By hitting the v key you will enter visual mode from where you are currently are. by utilizing navigation keys, you will notice that you are selecting stuff.
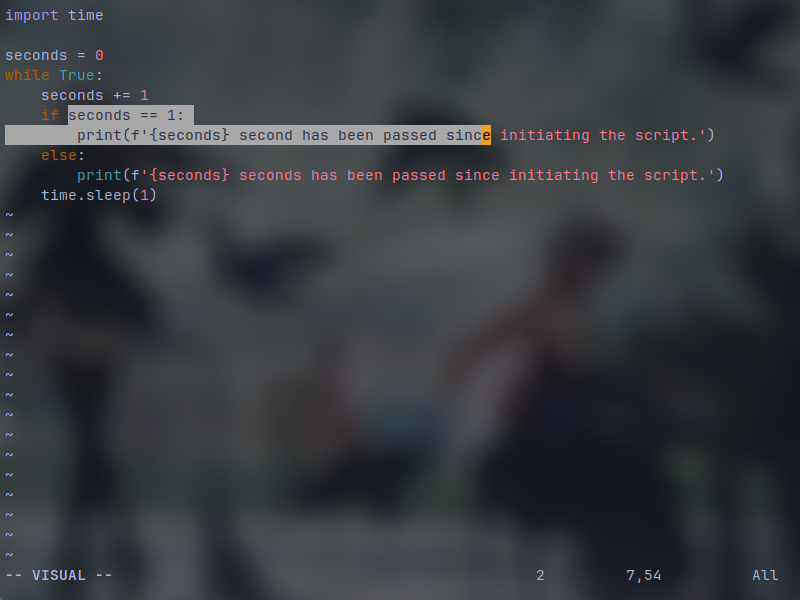 You can also go into visual line mode by pressing V (shift + v) key to select line by line.
Some key bindings:
v  # enter visual mode.
V  # enter visual line mode.
ggVG  # select all (a combined key binding).

d  # delete selected.
c  # edit selected
y  # yank (copy) selected to vims clipboard.
"+y  # yank selected to system clipboard (+ is included).
p  # paste from vim clipboard.
"+p  # paste from systems clipboard (+ is included).

# some combined key bindings:
yiw  # yank the next word.
yi[  # yank inside of the brackets.

# note: deleting (d) or editing (c) something automatically yanks them and you can paste them.
Customizing VIM
We can add numbers row, different themes and etc. in vim. in normal mode, we can type :set number to have a number row in our vim.
 Now we have a number row! there is another kind of numbers that we can put in our numbers row which I recommend since this is vim and lines count doesn't matter that much, I recommend to you to use :set relativenumber to have relative numbers instead of regular numbers. it would look something like this:
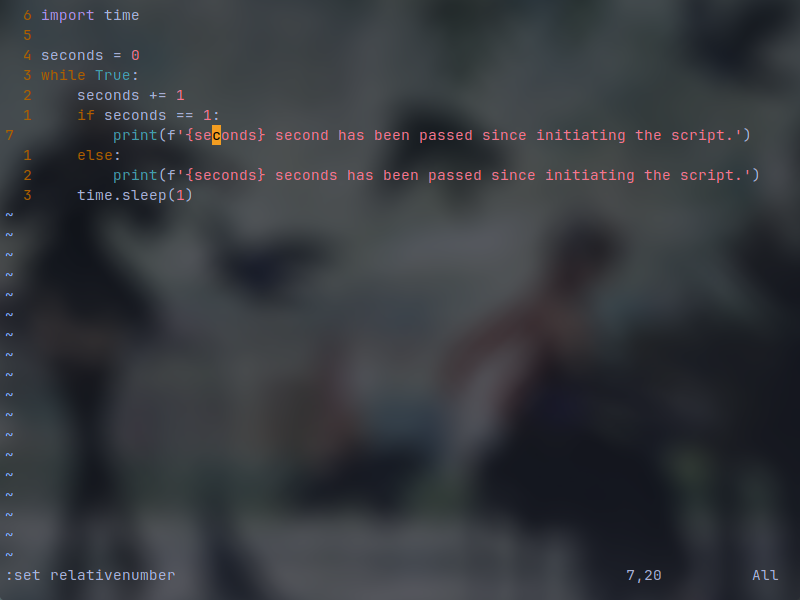 In this way we can easily identify which lines to jump. like I want to go to the beginning of my file. instead of holding down k key, I'll simply press 6k to jump 6 lines up easily without approximating and being certain.
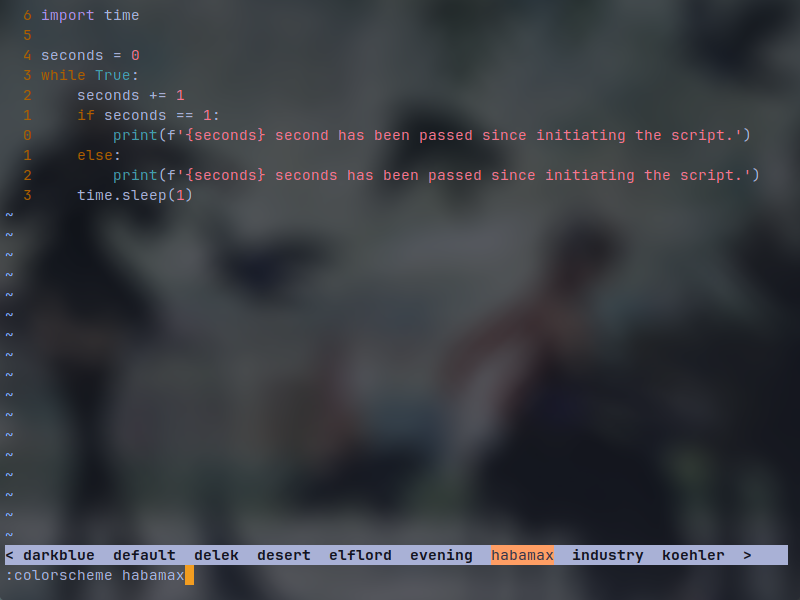
Now that we have added our number rows, let's change the theme. For changing the theme, you can type colorscheme and following that, you can choose your theme. for example :colorscheme habamax will change your theme to habamax. by just typing :colorscheme and following it pressing tab, you can view available themes and try them out.
By quitting and re-running vim, your theme and number rows will disappear and you have to set them again each time. Which is not productive. you can save all of your customizations inside your .vimrc file in your home directory. simply type vim ~/.vimrc . This is an example of a .vimrc file:
set number " sets numbers row
set relativenumber " sets relative numbers row
set tabstop=4 " makes tab to go 4 spaces
set shiftwidth=4 " makes indentation to have 4 spaces
set autoindent " makes auto indentation available
set mouse=a " sets mouse control to be active
colorscheme habamax  " sets habamax as the theme

" If you have problems with syntax highlightings after saving the .vimrc file:
syntax on
set background=dark
Modify it as you like and save it. now your customizations has been saved and will always work.
VIM Binds On Your Favorite IDEs
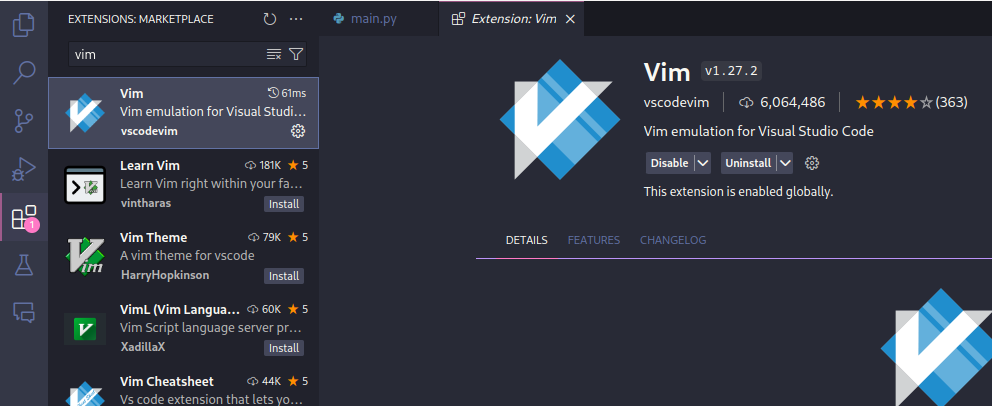
Visual Studio Code: Install vim extension from the marketplace and continue reading it's documentation since some of the configuarions may vary based on different operating systems.
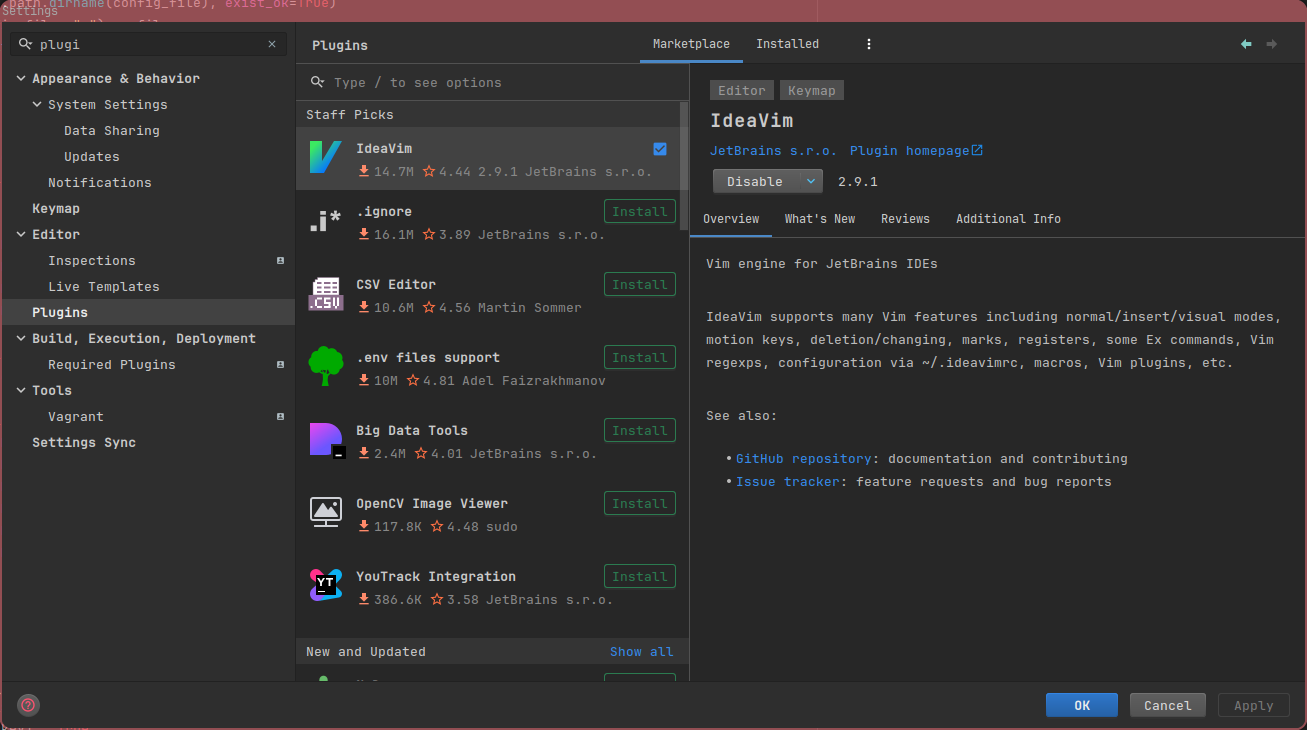
JetBrains IDEs: Go into settings/plugins/marketplace and search for ideavim plugin and install it.
 You can create ~/.ideavimrc file in your home directory for IDE vim configs. You can also just copy your .vimrc file and rename it to .ideavimrc and have the same configs (except the themes) in your IDE.
If you want to have a more cli based experience, I suggest you to look up neovim which will give you more options and you can literally turn it into a full fledged IDE. and a lot of tools like Github Copilot are supporting it as well.
Step Two
Well First step was a long step. If you've came this far, congratulations! it was definitely worth it. If you are new to this, I recommend you to stay in the first step and daily drive vim in your projects and use case to get used to it. Another thing I recommend, is choose one IDE, and stick to it. learn all of keybinds and get used to it. I like JetBrains IDEs in general because they have a lot of tools to work with. and I have gotten used to it's keybinding and in other IDEs such as VSCode, I have enabled the JetBrains key bindings extension to have the same key bindings.
And once again, if you have gotten used to keyboard and key bindings, mouse will get frustrating for you. You might have set up tiling window manager as well and the only time you are using your mouse, is when you are browsing on the internet.
Controlling Your Mouse Using Your Keyboard
Maybe some of you have looked into this, and fell into a dark hole and came out pretty frustrated. Cause I've been there too! I haven't found a good mouse simulator for keyboard. I have searched Github, asked people, etcetra etcetra. There were None that worked for me. And maybe that's also the case with you! Yeah I found some emulations that forked qmk firmware. But that was too much hassle. So I built one myself!
Check out https://github.com/rootamin/mouse_keys/ where I have explained how to work with it. Notice that I have only released linux version of it. the source code is there with I guide on how to build it on your operating system. You can also run the main script directly using Python just make sure that you have installed the required libraries.
In case of building it please beware of on other operating systems such as Mac OS or Windows, it might detect the script as a threat since it surpresses the keyboard for mouse controlling. You might have to bypass the file on your anti-virus. but after all, I'm recommending you to run it only on Linux since it's much more straight forward.
On the first run, mouse_keys will generate a config file inside ~/.config/mouse_keys/config directory. the contents of it will look like this:
[MouseKeys]
speed = 0.0025
shift_speed = 8
ctrl_speed = 0.25
You can change the values here. By reducing the speed variable, you are going to make mouse move faster because that's the time in between each mouse movement loop. the shift_speed and ctrl_speed will have more speed by higher the values are.
Here are the keybindings that my project uses:
arrow keys or h, j, k, l (vim binds) for directional mouse movement.
shift + directions for faster cursor movement speed.
ctrl + directions for slower cursor movement speed.
e for left click.
r for right click.
w, s, a, d for vertical and horizontal scrolling.

esc for terminating the process.
At the time of writing this blog, the script is pretty simple and does not have that much features. just some stuff that satisfies me and I hope it satisfies you as well. the source code is in there so you can modify how you like it. but who knows. I may optimize and add more features to it in future. currently it's poorly optimized and becauase of the continous keyboard tracking loop, it uses a lot of CPU usage compare to what it should.
Conclusion
This was my second blog on the website. If you have reached this far, I thank you <3
I hope you've learned some fun stuff in here and stepped up your geekity level!
Stay nerd and always act like a geek ;)